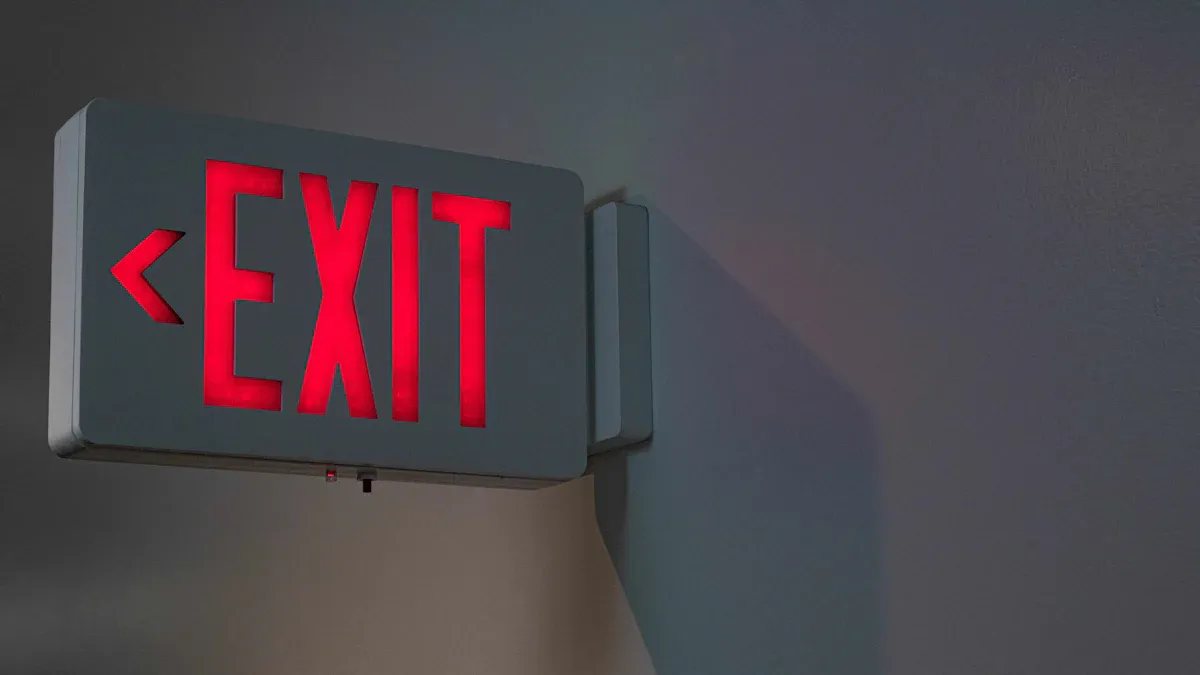
I always make regular maintenance of LED EMERGENCY EXIT SIGNS a top priority. Backup batteries can silently lose power, and LEDs may gradually dim. Neglecting monthly and annual tests leads to failures. Consistent checks help me ensure safety, meet codes, and protect everyone in the building.
Key Takeaways
- Regularly inspect and test LED emergency exit signs to ensure they stay bright and work during power outages, meeting safety codes and protecting everyone.
- Clean signs often and check batteries carefully to catch problems early, extend sign life, and avoid costly repairs or failures.
- Keep detailed records of all inspections, tests, and repairs to stay compliant with regulations and make future maintenance easier.
Why Maintenance Matters for LED Emergency Exit Signs
Safety and Code Compliance
When I manage a facility, I know that safety always comes first. LED EMERGENCY EXIT SIGNS play a vital role in guiding people to safety during emergencies. National fire codes, such as NFPA 101 and OSHA regulations, require that exit signs remain illuminated at all times. These codes also demand that emergency lighting lasts at least 1.5 hours after a power failure. I make sure that each sign is clearly visible, unobstructed, and properly mounted. Regular testing is not just a best practice—it is a legal requirement. I perform monthly tests to check if the lights stay on for at least 30 seconds and conduct annual tests to ensure they operate for the full 1.5 hours. I keep records of every inspection, knowing that authorities may review them at any time.
Tip: Always follow both national and local codes, as local rules may have extra requirements.
Cost Savings and Longevity
I have learned that regular maintenance saves money in the long run. When I inspect and clean LED EMERGENCY EXIT SIGNS, I catch small issues before they become expensive problems. Routine checks help me spot dim lights, battery wear, or physical damage early. This approach extends the lifespan of each sign and keeps them reliable. Neglecting maintenance leads to burnt-out bulbs, battery failure, and even legal risks. By staying proactive, I avoid costly emergency repairs and ensure that my facility remains compliant and safe for everyone.
LED Emergency Exit Signs Inspection Schedule
Staying on top of inspections keeps my facility safe and compliant. I follow a strict schedule for checking LED EMERGENCY EXIT SIGNS, guided by industry standards and regulations. Regular inspections help me catch problems early and prevent failures during emergencies.
| Inspection/Test Type | Frequency | Description/Requirement |
|---|---|---|
| Visual Inspection | At intervals not exceeding 30 days | Check operation of illumination sources; can be extended with authority approval. |
| Functional Testing (Battery) | Annually, minimum 1.5 hours | Full-duration test to ensure battery-powered emergency lighting operates for required time. |
| Self-testing Battery Equipment | At least every 30 days | Automatic self-test lasting minimum 30 seconds with diagnostic routine. |
| Record Keeping | Continuous | Written records of inspections and tests must be maintained for authority review. |
Monthly Visual Inspections
Every month, I walk through the building and check each exit sign. I use a checklist to make sure I do not miss anything important. Here are the steps I follow:
- I verify that all LED emergency exit signs are illuminated and easy to see.
- I check that nothing blocks the signs and that they are in the right place.
- I look for physical damage, like broken covers or corrosion in the battery compartment.
- I press the test button for about 30 seconds to make sure the battery backup works.
- I write down the results, including the location and any issues I find.
Note: Monthly inspections help me spot problems like burnt-out bulbs, blocked signs, or battery issues before they become serious. If I find any issues, I fix them right away to keep the building safe.
Monthly checks also help me meet NFPA 101 and OSHA requirements. These codes say that exit signs must stay lit for at least 90 minutes during a power outage. By following this routine, I make sure my facility is always ready for emergencies.
Annual Comprehensive Checks
Once a year, I perform a much deeper inspection. This annual check is more than just a quick look. I simulate a real power outage and make sure every sign works for at least 90 minutes. Here is what I do during the annual check:
- I run a full-duration test to confirm the battery can power the sign for the required time.
- I inspect the lighting to make sure it meets safety standards.
- I check the outside of each sign for discoloration, rust, cracks, or other damage.
- I make sure the signs are mounted securely and that all labels are easy to read.
- I look at the wiring and connections for any signs of wear or damage.
- I clean the fixtures to remove dust and dirt that could block the light.
- I check the batteries for swelling, leaks, or corrosion and replace them if needed.
- I record all test dates, who did the inspection, any problems found, and what I did to fix them.
Tip: Following the manufacturer’s guidelines for maintenance and battery replacement helps me avoid unexpected failures. I also make sure to keep detailed records, as fire inspectors may ask to see them.
If you want more tips or need professional support, you can always reach out to our team at [YourCompanyName] or connect with us on LinkedIn for updates and resources.
Cleaning and Visual Checks for LED Emergency Exit Signs

Removing Dust and Debris
I always make cleaning a regular part of my maintenance routine. Dust can build up on LED EMERGENCY EXIT SIGNS and block the light, making the ‘EXIT’ text hard to see. If dust covers the sign, people may not find the exit quickly during an emergency. Dust can also get inside the unit and cause the lights to flicker or dim. Sometimes, moisture and temperature changes make these problems worse. I know that keeping the signs clean helps them stay bright and reliable.
When I clean the signs, I follow these steps:
- I wipe the outside of the sign with a soft, dry cloth to remove dust and dirt.
- For stubborn spots, I use a cloth slightly dampened with water, making sure no water gets inside.
- I never use harsh chemicals because they can damage the cover and the LEDs.
- I always disconnect the power before I start cleaning to keep myself safe.
Tip: Regular cleaning keeps the signs clear and bright, so everyone can see them in an emergency.
Checking for Physical Damage or Obstruction
During my visual checks, I look for any signs of damage or anything blocking the sign. I often find these issues:
- Exposed or loose wiring, which can be a fire hazard
- Cracks or marks on the housing, especially on outdoor signs
- Loose mounting, which can cause the sign to fall or break
- Broken covers or faded letters
- Corrosion in the battery compartment from leaks
- Objects or decorations blocking the sign
If I see any of these problems, I fix them right away. I also use protective guards on signs in busy areas to prevent damage. Keeping the signs in good shape means they will work when I need them most.
Battery Testing and Replacement for LED Emergency Exit Signs
Testing Backup Batteries
I always make battery testing a top priority when maintaining LED EMERGENCY EXIT SIGNS. Backup batteries must provide at least 90 minutes of continuous illumination during a power failure. This requirement comes from UL 924 and NFPA 101 standards. To meet these standards, I follow a regular testing routine:
- I perform a monthly 30-second test by pressing the test button on each sign. This quick check confirms that the emergency illumination and battery function work as expected.
- Once a year, I run a full 90-minute discharge test. This test simulates a real power outage and ensures the battery can keep the sign lit for the required time.
- Many modern signs have self-testing features. These models automate both monthly and annual tests, which saves time and reduces the chance of missing a check.
- I check the charge indicator and test switch to make sure the system is ready for emergencies.
Tip: Always check the battery type—most signs use sealed Nickel-Cadmium, Nickel-Metal Hydride, or Lithium-ion batteries. Each type has unique maintenance needs.
Replacing Batteries on Schedule
I know that batteries degrade over time, even with regular testing. During monthly inspections, I look for signs of corrosion, leaks, or swelling in the battery compartment. If I notice any of these issues, I replace the battery right away. I also pay attention to batteries that no longer hold a full charge during annual tests. There is no fixed replacement interval, so I use a condition-based approach. This means I replace batteries when they show signs of wear, not just by the calendar.
- I always inspect the battery compartment during monthly checks.
- I replace batteries that fail to provide 90 minutes of illumination or show physical damage.
- I keep records of all replacements to track battery performance over time.
Note: Regular testing and timely replacement keep exit signs reliable and compliant with safety codes.
Functional Testing Procedures for LED Emergency Exit Signs

Using the Test Button
I always start my functional testing by using the test button on each sign. This button gives me a quick way to check if the emergency circuit and battery work as they should. I press and hold the test button for at least 30 seconds. During this time, I watch the sign to make sure it stays bright and does not flicker. If the light dims or goes out, I know there is a problem with the battery or the internal wiring. I also listen for any unusual sounds, like buzzing or clicking, which can signal electrical issues.
Tip: I always perform this test during my monthly inspections. It helps me catch problems early and keeps my facility safe.
Performing Load Tests
Once a year, I perform a full load test on all LED EMERGENCY EXIT SIGNS. This test simulates a real power outage. I disconnect the main power supply and let the sign run on battery backup for at least 90 minutes. I check that the sign remains fully illuminated for the entire test period. If the sign dims or shuts off before the time is up, I replace the battery right away. I record the results in my inspection log, noting the date, time, and outcome of each test.
Note: Load tests are critical for meeting safety codes and ensuring the signs will work during an actual emergency.
Record-Keeping for LED Emergency Exit Signs Compliance
Maintaining Inspection Logs
I always keep detailed inspection logs to ensure compliance and accountability. These records help me track every check and test I perform. I include the date, time, and name of the person responsible for each task. I also document the results, such as illumination levels and battery condition. If I find any issues, I note the corrective actions I take. To make my records easy to review, I organize them in a table like this:
| Inspection Task | Frequency | Regulatory/Standard Source |
|---|---|---|
| Visual Inspection | Monthly | NFPA 101 |
| Functional Test (30 seconds) | Monthly | NFPA 101 |
| Functional Test (90 minutes) | Annually | NFPA 101 |
| Cleaning | As needed | Best practice |
| Battery Replacement | Per manufacturer or upon failure | Manufacturer specifications |
| Exit Route Illumination Check | Monthly | OSHA 29 CFR 1910.37 |
I make sure to sign and date each entry. This process creates a clear record for compliance audits and helps me stay organized.
Documenting Repairs and Replacements
Whenever I repair or replace a sign, I document every detail. I record the date, time, and type of service performed. I also include the technician’s name and a summary of the work. For added clarity, I attach service labels to each unit, showing the month and year of service. I keep all documentation for at least four years, as required by most authorities. This practice ensures I can provide proof of compliance during inspections or insurance reviews.
Tip: Keeping thorough records not only meets legal requirements but also makes future maintenance easier and more efficient.
Troubleshooting Common LED Emergency Exit Signs Issues
Dim or Flickering Lights
When I notice dim or flickering lights, I know it signals a problem that needs quick attention. I follow a step-by-step process to find and fix the issue:
- I check the battery’s age and condition. Old or weak batteries often cause lights to dim or flicker.
- I replace the battery if it is near the end of its lifespan.
- I inspect all wiring and connections for damage or corrosion. Damaged wires can disrupt power flow.
- I tighten any loose connections and replace wires if needed.
- I use a multimeter to check the battery voltage. A low reading means the battery needs replacement.
- I check the bulbs for damage or if they are not seated properly. I replace or reseat them as needed.
- I perform a full 90-minute test by turning off the main power. I watch the lights to see if they stay bright.
- If the problem continues, I consider replacing the fixture.
Tip: Regular inspections help me catch these issues before they become emergencies.
Sign Not Illuminating During Power Outage
If a sign does not light up during a power outage, I look for several common causes:
- Battery problems. Batteries lose charge over time, especially in harsh environments.
- Poor maintenance. Skipping regular tests allows battery or wiring issues to go unnoticed.
- Electrical faults. Loose or damaged wiring can stop power from reaching the sign.
- Environmental factors. Extreme heat or cold can reduce battery performance.
- Installation errors. Incorrect placement or loose mounting can cause failures.
To fix these problems, I test and replace batteries as needed, inspect and repair wiring, and make sure the sign is installed correctly. I also control the environment when possible to protect the fixtures.
Unique Benefits and Maintenance Needs of LED Emergency Exit Signs
Energy Efficiency and Lower Heat Output
I always look for ways to reduce energy costs in my facility. LED emergency exit signs help me achieve this goal. These signs use less than 5 watts of power, while older incandescent models can use up to 40 watts. This means I save up to 95% on energy for each sign. Over a year, switching just ten signs from incandescent to LED can save more than $300 on electricity bills. I also notice that LED signs produce very little heat. This keeps the area around the sign cooler and reduces the load on my building’s air conditioning. Unlike fluorescent signs, LEDs do not contain mercury, so I do not worry about hazardous materials. Here is a quick comparison:
| Sign Type | Power Use | Lifespan (hours) | Environmental Impact |
|---|---|---|---|
| LED | Under 5 W | Over 25,000 | Mercury-free, low carbon |
| Incandescent | Up to 40 W | Short | Generates heat, more waste |
| Fluorescent | 8–15 W | Moderate | Contains mercury |
Tip: Lower energy use means lower costs and a safer, greener facility.
Longer Lifespan Compared to Traditional Signs
I have found that LED emergency exit signs last much longer than traditional options. Most LED signs work for over 25,000 hours, which often means more than 10 years without needing a bulb change. Traditional signs need frequent bulb and battery replacements, which increases maintenance time and costs. I also see fewer failures with LEDs, so I spend less time on repairs. Some dual-technology signs combine LED and photoluminescent materials, pushing the lifespan even further—sometimes up to 20 years. This long life means I can focus on other important tasks in my facility, knowing my exit signs will stay reliable.
- Traditional signs: Shorter lifespan, more maintenance.
- LED signs: Last longer, need fewer replacements, lower total cost.
Note: Choosing LED signs helps me keep my building safe and my maintenance routine simple.
I keep my facility safe by following a proactive maintenance schedule. Regular inspections and cleaning prevent failures and support compliance. I rely on professional support for technical accuracy and thorough documentation. I always schedule the next inspection to ensure my LED EMERGENCY EXIT SIGNS remain reliable and ready for emergencies.
FAQ
How often should I test LED emergency exit signs?
I test my LED emergency exit signs every month. I also perform a full 90-minute battery test once a year to ensure compliance.
What should I do if an exit sign fails a test?
I replace the battery or repair the wiring immediately. I always document the issue and the fix in my maintenance log.
Can I clean LED emergency exit signs with any cleaner?
| Cleaner Type | Safe to Use? |
|---|---|
| Mild soap & water | ✅ |
| Harsh chemicals | ❌ |
I use only mild soap and water. Harsh chemicals damage the sign.