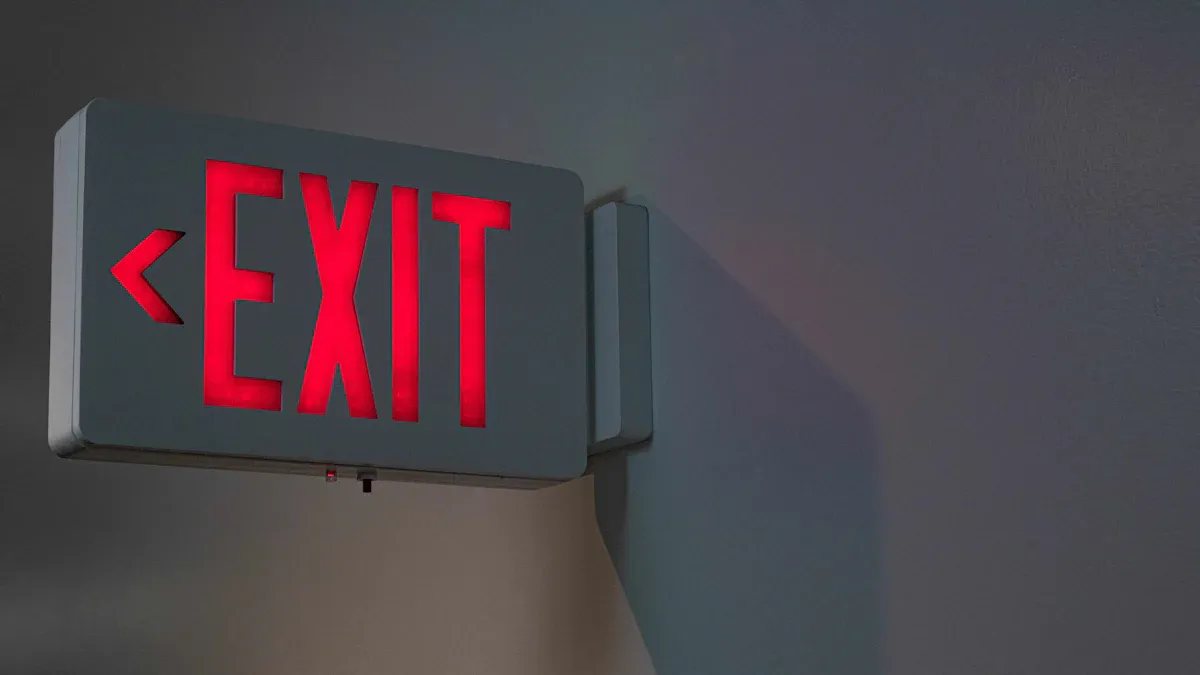
I always make regular maintenance of LED EMERGENCY EXIT SIGNS a top priority. Backup batteries can silently lose power, and LEDs may gradually dim. Neglecting monthly and annual tests leads to failures. Consistent checks help me ensure safety, meet codes, and protect everyone in the building.
주요 테이크 아웃
- Regularly inspect and test LED emergency exit signs to ensure they stay bright and work during power outages, meeting safety codes and protecting everyone.
- Clean signs often and check batteries carefully to catch problems early, extend sign life, and avoid costly repairs or failures.
- Keep detailed records of all inspections, tests, and repairs to stay compliant with regulations and make future maintenance easier.
Why Maintenance Matters for LED Emergency Exit Signs
Safety and Code Compliance
When I manage a facility, I know that safety always comes first. LED EMERGENCY EXIT SIGNS play a vital role in guiding people to safety during emergencies. National fire codes, such as NFPA 101 and OSHA regulations, require that exit signs remain illuminated at all times. These codes also demand that emergency lighting lasts at least 1.5 hours after a power failure. I make sure that each sign is clearly visible, unobstructed, and properly mounted. Regular testing is not just a best practice—it is a legal requirement. I perform monthly tests to check if the lights stay on for at least 30 seconds and conduct annual tests to ensure they operate for the full 1.5 hours. I keep records of every inspection, knowing that authorities may review them at any time.
Tip: Always follow both national and local codes, as local rules may have extra requirements.
Cost Savings and Longevity
I have learned that regular maintenance saves money in the long run. When I inspect and clean LED EMERGENCY EXIT SIGNS, I catch small issues before they become expensive problems. Routine checks help me spot dim lights, battery wear, or physical damage early. This approach extends the lifespan of each sign and keeps them reliable. Neglecting maintenance leads to burnt-out bulbs, battery failure, and even legal risks. By staying proactive, I avoid costly emergency repairs and ensure that my facility remains compliant and safe for everyone.
LED Emergency Exit Signs Inspection Schedule
Staying on top of inspections keeps my facility safe and compliant. I follow a strict schedule for checking LED EMERGENCY EXIT SIGNS, guided by industry standards and regulations. Regular inspections help me catch problems early and prevent failures during emergencies.
| Inspection/Test Type | 빈도 | Description/Requirement |
|---|---|---|
| Visual Inspection | At intervals not exceeding 30 days | Check operation of illumination sources; can be extended with authority approval. |
| Functional Testing (Battery) | Annually, minimum 1.5 hours | Full-duration test to ensure battery-powered emergency lighting operates for required time. |
| Self-testing Battery Equipment | At least every 30 days | Automatic self-test lasting minimum 30 seconds with diagnostic routine. |
| Record Keeping | Continuous | Written records of inspections and tests must be maintained for authority review. |
Monthly Visual Inspections
Every month, I walk through the building and check each exit sign. I use a checklist to make sure I do not miss anything important. Here are the steps I follow:
- I verify that all LED emergency exit signs are illuminated and easy to see.
- I check that nothing blocks the signs and that they are in the right place.
- I look for physical damage, like broken covers or corrosion in the battery compartment.
- I press the test button for about 30 seconds to make sure the battery backup works.
- I write down the results, including the location and any issues I find.
Note: Monthly inspections help me spot problems like burnt-out bulbs, blocked signs, or battery issues before they become serious. If I find any issues, I fix them right away to keep the building safe.
Monthly checks also help me meet NFPA 101 and OSHA requirements. These codes say that exit signs must stay lit for at least 90 minutes during a power outage. By following this routine, I make sure my facility is always ready for emergencies.
Annual Comprehensive Checks
Once a year, I perform a much deeper inspection. This annual check is more than just a quick look. I simulate a real power outage and make sure every sign works for at least 90 minutes. Here is what I do during the annual check:
- I run a full-duration test to confirm the battery can power the sign for the required time.
- I inspect the lighting to make sure it meets safety standards.
- I check the outside of each sign for discoloration, rust, cracks, or other damage.
- I make sure the signs are mounted securely and that all labels are easy to read.
- I look at the wiring and connections for any signs of wear or damage.
- I clean the fixtures to remove dust and dirt that could block the light.
- I check the batteries for swelling, leaks, or corrosion and replace them if needed.
- I record all test dates, who did the inspection, any problems found, and what I did to fix them.
Tip: Following the manufacturer’s guidelines for maintenance and battery replacement helps me avoid unexpected failures. I also make sure to keep detailed records, as fire inspectors may ask to see them.
If you want more tips or need professional support, you can always reach out to our team at [YourCompanyName] or connect with us on LinkedIn for updates and resources.
Cleaning and Visual Checks for LED Emergency Exit Signs

Removing Dust and Debris
I always make cleaning a regular part of my maintenance routine. Dust can build up on LED EMERGENCY EXIT SIGNS and block the light, making the ‘EXIT’ text hard to see. If dust covers the sign, people may not find the exit quickly during an emergency. Dust can also get inside the unit and cause the lights to flicker or dim. Sometimes, moisture and temperature changes make these problems worse. I know that keeping the signs clean helps them stay bright and reliable.
When I clean the signs, I follow these steps:
- I wipe the outside of the sign with a soft, dry cloth to remove dust and dirt.
- For stubborn spots, I use a cloth slightly dampened with water, making sure no water gets inside.
- I never use harsh chemicals because they can damage the cover and the LEDs.
- I always disconnect the power before I start cleaning to keep myself safe.
Tip: Regular cleaning keeps the signs clear and bright, so everyone can see them in an emergency.
Checking for Physical Damage or Obstruction
During my visual checks, I look for any signs of damage or anything blocking the sign. I often find these issues:
- Exposed or loose wiring, which can be a fire hazard
- Cracks or marks on the housing, especially on outdoor signs
- Loose mounting, which can cause the sign to fall or break
- Broken covers or faded letters
- Corrosion in the battery compartment from leaks
- Objects or decorations blocking the sign
If I see any of these problems, I fix them right away. I also use protective guards on signs in busy areas to prevent damage. Keeping the signs in good shape means they will work when I need them most.
Battery Testing and Replacement for LED Emergency Exit Signs
Testing Backup Batteries
I always make battery testing a top priority when maintaining LED EMERGENCY EXIT SIGNS. Backup batteries must provide at least 90 minutes of continuous illumination during a power failure. This requirement comes from UL 924 and NFPA 101 standards. To meet these standards, I follow a regular testing routine:
- I perform a monthly 30-second test by pressing the test button on each sign. This quick check confirms that the emergency illumination and battery function work as expected.
- Once a year, I run a full 90-minute discharge test. This test simulates a real power outage and ensures the battery can keep the sign lit for the required time.
- Many modern signs have self-testing features. These models automate both monthly and annual tests, which saves time and reduces the chance of missing a check.
- I check the charge indicator and test switch to make sure the system is ready for emergencies.
Tip: Always check the battery type—most signs use sealed Nickel-Cadmium, Nickel-Metal Hydride, or Lithium-ion batteries. Each type has unique maintenance needs.
Replacing Batteries on Schedule
I know that batteries degrade over time, even with regular testing. During monthly inspections, I look for signs of corrosion, leaks, or swelling in the battery compartment. If I notice any of these issues, I replace the battery right away. I also pay attention to batteries that no longer hold a full charge during annual tests. There is no fixed replacement interval, so I use a condition-based approach. This means I replace batteries when they show signs of wear, not just by the calendar.
- I always inspect the battery compartment during monthly checks.
- I replace batteries that fail to provide 90 minutes of illumination or show physical damage.
- I keep records of all replacements to track battery performance over time.
Note: Regular testing and timely replacement keep exit signs reliable and compliant with safety codes.
Functional Testing Procedures for LED Emergency Exit Signs

Using the Test Button
I always start my functional testing by using the test button on each sign. This button gives me a quick way to check if the emergency circuit and battery work as they should. I press and hold the test button for at least 30 seconds. During this time, I watch the sign to make sure it stays bright and does not flicker. If the light dims or goes out, I know there is a problem with the battery or the internal wiring. I also listen for any unusual sounds, like buzzing or clicking, which can signal electrical issues.
Tip: I always perform this test during my monthly inspections. It helps me catch problems early and keeps my facility safe.
Performing Load Tests
Once a year, I perform a full load test on all LED EMERGENCY EXIT SIGNS. This test simulates a real power outage. I disconnect the main power supply and let the sign run on battery backup for at least 90 minutes. I check that the sign remains fully illuminated for the entire test period. If the sign dims or shuts off before the time is up, I replace the battery right away. I record the results in my inspection log, noting the date, time, and outcome of each test.
Note: Load tests are critical for meeting safety codes and ensuring the signs will work during an actual emergency.
Record-Keeping for LED Emergency Exit Signs Compliance
Maintaining Inspection Logs
I always keep detailed inspection logs to ensure compliance and accountability. These records help me track every check and test I perform. I include the date, time, and name of the person responsible for each task. I also document the results, such as illumination levels and battery condition. If I find any issues, I note the corrective actions I take. To make my records easy to review, I organize them in a table like this:
| Inspection Task | 빈도 | Regulatory/Standard Source |
|---|---|---|
| Visual Inspection | 월간 간행물 | NFPA 101 |
| Functional Test (30 seconds) | 월간 간행물 | NFPA 101 |
| Functional Test (90 minutes) | 매년 | NFPA 101 |
| Cleaning | As needed | Best practice |
| Battery Replacement | Per manufacturer or upon failure | Manufacturer specifications |
| 경로 조명 검사를 종료하십시오 | 월간 간행물 | OSHA 29 CFR 1910.37 |
각 항목에 서명하고 날짜를 정해야합니다. 이 프로세스는 규정 준수 감사에 대한 명확한 기록을 생성하며 정리를 유지하는 데 도움이됩니다.
수리 및 교체 문서화
부호를 수리하거나 교체 할 때마다 모든 세부 사항을 문서화합니다. 수행 된 날짜, 시간 및 서비스 유형을 기록합니다. 또한 기술자의 이름과 작업 요약을 포함합니다. 명확성을 위해 서비스 라벨을 각 장치에 첨부하여 서비스의 월과 연도를 보여줍니다. 나는 대부분의 당국이 요구하는대로 적어도 4 년 동안 모든 문서를 유지합니다. 이 관행은 검사 또는 보험 검토 중에 규정 준수 증명을 제공 할 수 있도록합니다.
팁 : 철저한 기록을 유지하는 것은 법적 요구 사항을 충족 할뿐만 아니라 향후 유지 보수를보다 쉽고 효율적으로 만듭니다.
일반적인 LED 응급 출구 표지판 문제 해결 문제
희미하거나 깜박 거리는 조명
희미하거나 깜박 거리는 조명을 발견하면 빠른주의가 필요한 문제를 알 수 있습니다. 단계별 프로세스를 따라 문제를 찾고 수정합니다.:
- 배터리의 나이와 상태를 확인합니다. 오래된 배터리 또는 약한 배터리는 종종 조명이 어두워 지거나 깜박입니다.
- 배터리가 수명이 끝나면 배터리를 교체합니다.
- 나는 모든 배선과 연결에 손상이나 부식을 검사합니다. 손상된 와이어는 전력 흐름을 방해 할 수 있습니다.
- 필요한 경우 느슨한 연결을 조이고 전선을 교체합니다.
- 배터리 전압을 확인하기 위해 멀티 미터를 사용합니다. 읽기가 낮 으면 배터리가 교체가 필요하다는 것을 의미합니다.
- 전구가 손상되거나 제대로 장착되지 않은지 확인합니다. 나는 필요에 따라 교체하거나 재 장착합니다.
- 주요 전원을 끄면 90 분의 전체 테스트를 수행합니다. 나는 그들이 밝게 유지되는지보기 위해 조명을 봅니다.
- 문제가 계속되면 고정물 교체를 고려합니다.
팁 : 정기 검사를 통해 이러한 문제가 비상 사태가되기 전에 이러한 문제를 해결하는 데 도움이됩니다.
정전 중에 조명을 조명하지 마십시오
정전 중에 표시가 불이 켜지지 않으면 몇 가지 일반적인 원인을 찾습니다.:
- 배터리 문제. 배터리는 시간이 지남에 따라, 특히 가혹한 환경에서 충전이 증가합니다.
- 유지 보수 불량. 정기 테스트를 건너 뛰면 배터리 또는 배선 문제가 눈에 띄지 않게됩니다.
- 전기 결함. 느슨하거나 손상된 배선은 전력이 부호에 도달하는 것을 막을 수 있습니다.
- 환경 적 요인. 극심한 열이나 추위는 배터리 성능을 줄일 수 있습니다.
- 설치 오류. 잘못된 배치 또는 느슨한 장착으로 인해 고장이 발생할 수 있습니다.
이러한 문제를 해결하기 위해 필요에 따라 배터리를 테스트하고 교체하고 배선을 검사하고 수리 한 다음 부호가 올바르게 설치되어 있는지 확인하십시오. 또한기구를 보호하기 위해 가능한 경우 환경을 제어합니다.
LED 응급 출구 표지판의 고유 한 혜택 및 유지 보수 요구
에너지 효율 및 낮은 열 출력
나는 항상 시설에서 에너지 비용을 줄이는 방법을 찾고 있습니다. LED 비상 출구 표지판은이 목표를 달성하는 데 도움이됩니다. 이 표지판은 5 와트 미만의 전력을 사용하는 반면, 오래된 백열기 모델은 최대 40 와트를 사용할 수 있습니다. 즉, 각 부호에 대한 에너지에 대해 최대 95%를 절약 할 수 있습니다. 1 년 동안 백열에서 LED로 10 개의 표시를 전환하면 전기 요금에 $300 이상을 절약 할 수 있습니다. 또한 LED 표시는 열이 거의 없다는 것을 알았습니다. 이것은 부호 주위의 영역을 시원하게 유지하고 내 건물의 에어컨의 하중을 줄입니다. 형광 표지판과 달리 LED에는 수은이 포함되어 있지 않으므로 유해 물질에 대해 걱정하지 않습니다. 다음은 빠른 비교입니다:
| 사인 유형 | 전원 사용 | 수명 (시간) | 환경 영향 |
|---|---|---|---|
| 주도의 | 5 w 미만 | 25,000 이상 | 수은이없고 저탄소 |
| 백열 | 최대 40W | 짧은 | 열, 더 많은 폐기물을 생성합니다 |
| 형광 | 8–15 w | 보통의 | 수성이 포함되어 있습니다 |
팁 : 에너지 사용이 낮아지면 비용이 낮아지고 더 안전하고 친환경적인 시설이 있습니다.
전통적인 표지판에 비해 수명이 길다
나는 비상 출구 표지판이 전통적인 옵션보다 훨씬 오래 지속된다는 것을 발견했다. 대부분의 LED 표지판은 25,000 시간 이상 작동하며, 이는 종종 전구 교체없이 10 년 이상을 의미합니다. 전통적인 표지판에는 빈번한 전구와 배터리 교체가 필요하므로 유지 보수 시간과 비용이 증가합니다. 또한 LED로 실패가 줄어들므로 수리에 더 적은 시간을 소비합니다. 일부 이중 기술 표지판은 LED와 광 발광 재료를 결합하여 수명을 훨씬 더 밀어냅니다. 이 긴 수명은 내 시설의 다른 중요한 작업에 집중할 수 있으며 출구 표지판을 신뢰할 수 있다는 것을 알고 있습니다.
- 전통적인 표지판 : 수명이 짧고 유지 보수가 더 많습니다.
- LED 표지판 : 마지막으로, 교체가 적고, 총 비용이 적습니다.
참고 : LED 표지판을 선택하면 건물을 안전하게 지키고 유지 보수 일상을 간단하게 유지하는 데 도움이됩니다.
적극적인 유지 보수 일정에 따라 시설을 안전하게 유지합니다. 정기 검사 및 청소는 실패를 방지하고 준수를 지원합니다. 기술적 정확성과 철저한 문서에 대한 전문적인 지원에 의존합니다. 나는 항상 다음 검사를 예약하여 LED 응급 출구 표지판을 신뢰할 수 있고 비상 사태에 대비할 수 있도록합니다.
FAQ
LED 응급 출구 표지판을 얼마나 자주 테스트해야합니까?
매달 LED 응급 출구 표지판을 테스트합니다. 또한 규정 준수를 보장하기 위해 1 년에 한 번 90 분의 배터리 테스트를 수행합니다.
종료 표시가 테스트에 실패하면 어떻게해야합니까?
배터리를 교체하거나 배선을 즉시 수리합니다. 항상 유지 보수 로그에 문제와 수정 사항을 문서화합니다.
클리너로 LED 응급 출구 표지판을 청소할 수 있습니까?
| 클리너 유형 | 사용하기에 안전합니까? |
|---|---|
| 온화한 비누 및 물 | ✅ |
| 가혹한 화학 물질 | ❌ |
나는 온화한 비누와 물만 사용합니다. 가혹한 화학 물질이 부호를 손상시킵니다.